Deploying Your Campaign
Overview
In order to present your referral campaign on your website, you must deploy your campaign using your embed code from the dashboard. In this guide, we will explain the most popular ways to do that, how to choose the right type of deployment, and how to customize your deployment and tailor it to your needs.
Deployment types
Choose the right deployment type for you, based on the type of website you own, and the use case you are looking for, key benefits, and time to deployment.
| Deployment Strategy | Applicable Websites | Key Benefits | Time to Deployment |
|---|---|---|---|
| Standard HTML Deployment | All websites | Deploy your campaign anywhere HTML can go | ~3 minutes |
| Shopify Liquid Deployment | Shopify stores | Deploy your campaign anywhere in your Shopify store except for checkout, includes product page | ~10 minutes |
| Shopify App Deployment | Shopify stores | Deploy your campaign through the Shopify theme editor, includes checkout page | ~5 minutes |
Starting your deployment
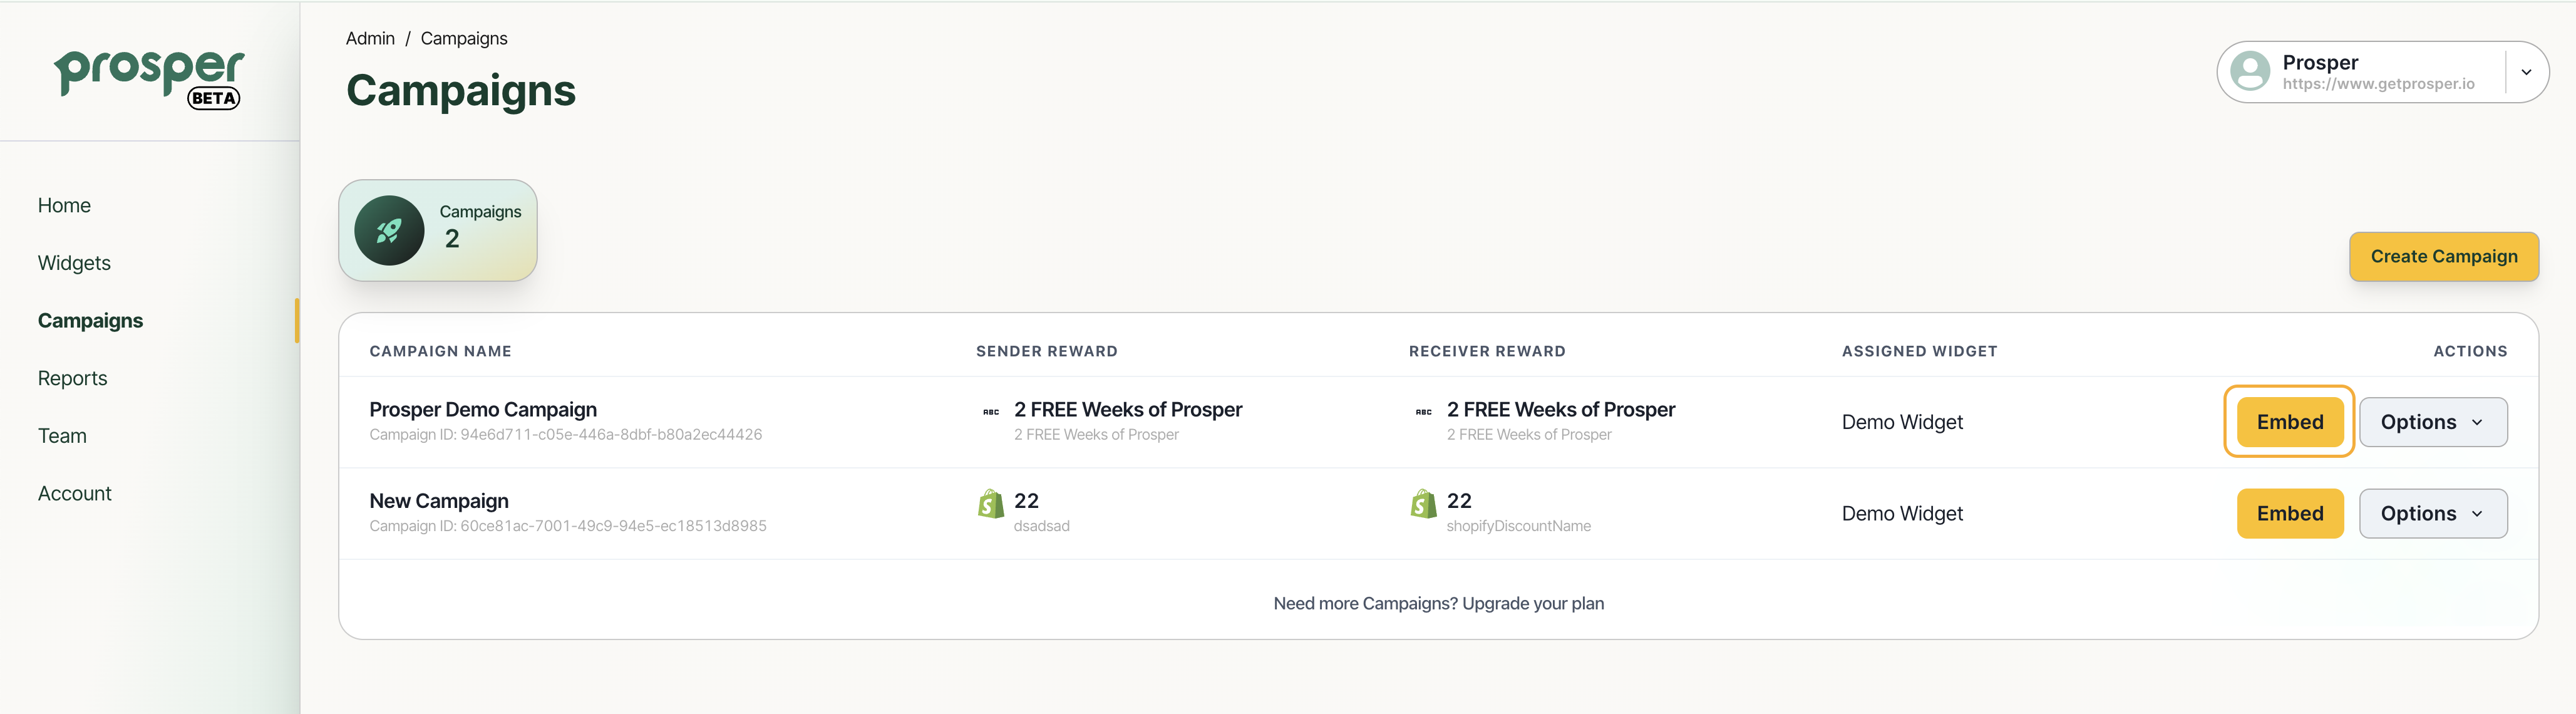
Begin by finding your campaign's embed code from the dashboard. Simply go to your campaigns page, locate the right campaign and click embed, then copy the code.
Standard HTML Deployment
Any website that accepts HTML code can be used to deploy a Prosper referral campaign.
Paste the code anywhere in your website to deploy your campaign
<!DOCTYPE html>
<html lang="en-US">
   <body body bgcolor="#282A36" style="padding: 20px;">
       <!--Start embed code-->
       <div id="prosper-container"
         data-tenant_id="9daedc94-3890-4fef-a398-ab8c5b1ce390"
         data-campaign_id="94e6d711-c05e-446a-8dbf-b80a2ec44426">
       </div>
       <script src="https://prosper-aws.netlify.app/index.js"></script>
       <!--End embed code-->
   </body>
</html>
Result:
Your campaign will now be deployed, and can be customized using CSS.
Shopify Liquid Deployment
If you are using Shopify, chances are you had a web professional build your custom Shopify theme. In order to add Prosper on top of your existent theme, or insert it into Shopify specific areas such as the product page, you must deploy the campaign using Shopify's Liquid code editor.
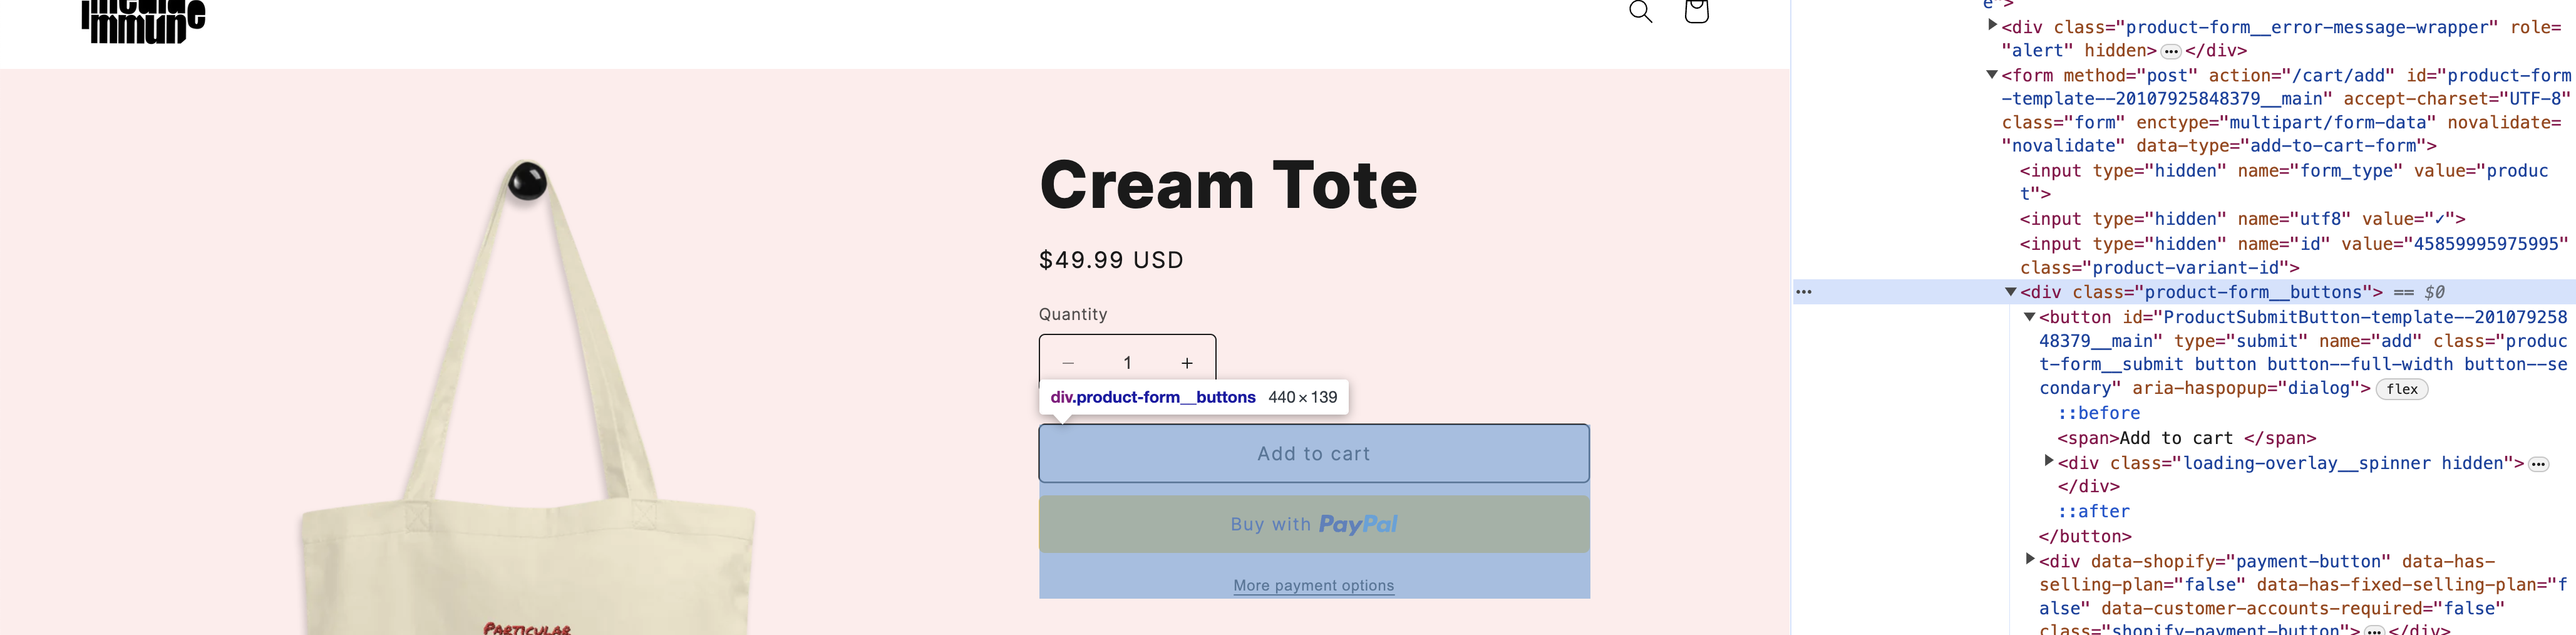
We will begin identifying the area in which we want to deploy the widget, and inspect its contents to find its whereabouts in the code. In this example, the section we are trying to edit is called product-form. We will take this information, and search for the right file until we find the correct element to place our embed code next to,
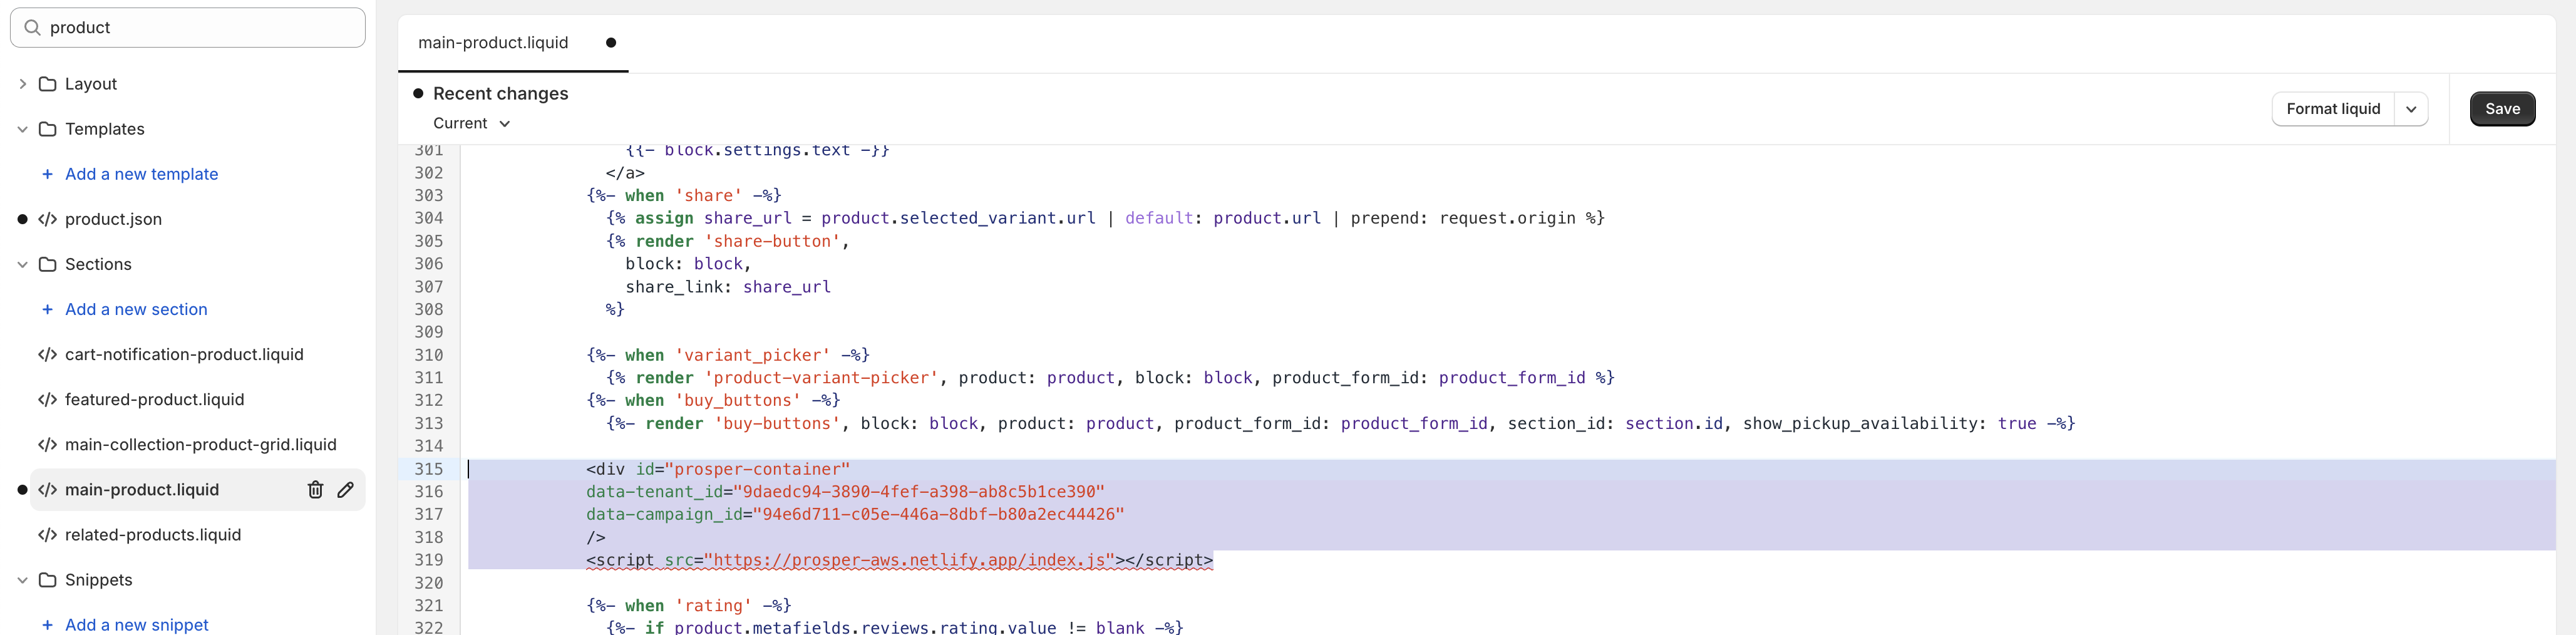
To begin editing your Shopify website, In your Shopify dashboard click Online Store on the left hand menu, then go into the Themes submenu item. Locate your current theme at the top, click the 3 dot menu and select 'Edit Code'. After finding the right section in the previous step, we will paste our embed code into the right area, and ensure to delete the closing </div> tag and replace it with a self closing <div/> to ensure Liquid renders the widget.
<div id="prosper-container"
  data-tenant_id="9daedc94-3890-4fef-a398-ab8c5b1ce390"
  data-campaign_id="94e6d711-c05e-446a-8dbf-b80a2ec44426">
</div> <!--Standard embed-->
<script src="https://prosper-aws.netlify.app/index.js"></script>


<div id="prosper-container"
  data-tenant_id="9daedc94-3890-4fef-a398-ab8c5b1ce390"
  data-campaign_id="94e6d711-c05e-446a-8dbf-b80a2ec44426"
/> <!--Self closing div-->
<script src="https://prosper-aws.netlify.app/index.js"></script>
Finally, place your new embed code into your liquid file, and save it.
Your campaign will now be deployed, and can be customized using CSS.
Shopify App Deployment
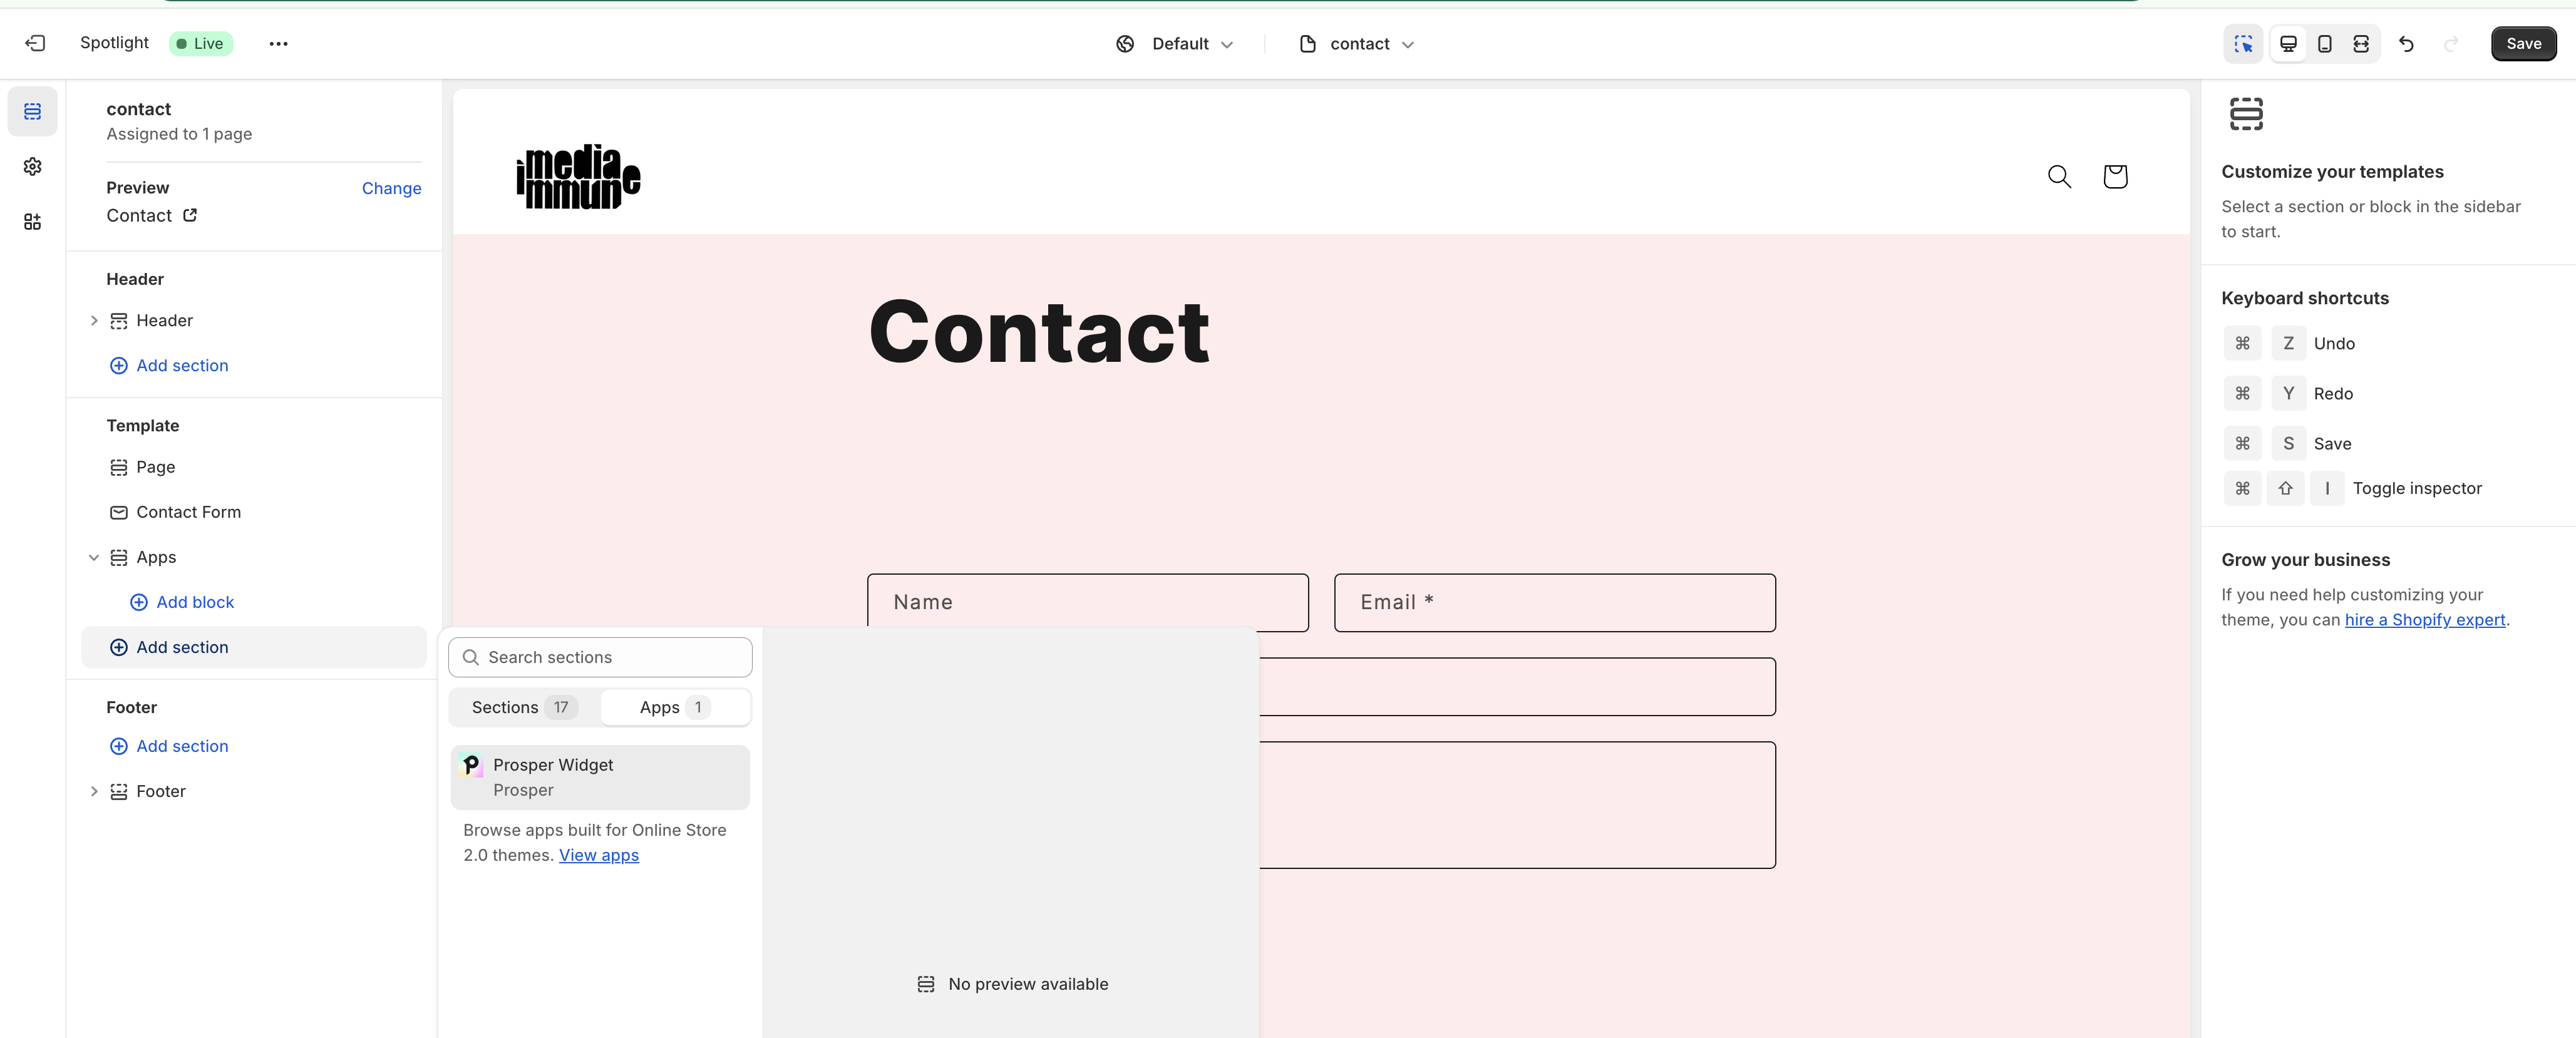
Shopify users can also deploy Prosper easily through Shopify's theme editor, anywhere where you can add a section, including to the checkout (Shopify Plus only) and cart pages, or a custom referral landing page.
After installing Prosper's Shopify app, In your theme editor you will see Prosper under Apps when clicking 'Add Section'. Simply copy your campaign and tenant ID over from the embed code, and paste it into Shopify. Your campaign will now be deployed, and can be customized using CSS.
Deploying to Order Status page
While Shopify Plus users are able to customize their checkout using the theme editor, not all users can do that. If you are a classic Shopify user you can deploy to your order status page by following these steps.
Copy the following code, and paste in your tenant ID and campaign ID from your embed code
Next, go to your Shopify settings and click the Checkout menu item. Scroll all the way down, and paste your the above code with your credentials into the additional scripts under Order status page.

Customizing your deployment with CSS
You can customize your deployment and tailor it to your liking using CSS statements. Simply add the style attribute to the div titled prosper-container and add the CSS statements you'd like. Below is an example
<!DOCTYPE html>
<html lang="en-US">
   <head>
       <style>
       @import url('https://fonts.googleapis.com/css2?family=Protest+Riot&display=swap')
       </style>
   </head>
   <body body bgcolor="#282A36" style="padding: 20px;">
       <!--Start embed code-->
       <div id="prosper-container"

         style="width: 455px; margin: auto; font-family: Protest Riot, sans-serif;"

         data-tenant_id="9daedc94-3890-4fef-a398-ab8c5b1ce390"
         data-campaign_id="94e6d711-c05e-446a-8dbf-b80a2ec44426">
       </div>
       <script src="https://prosper-aws.netlify.app/index.js"></script>
       <!--End embed code-->
   </body>
</html>
Result: